

Knowledge Base & Support
TOPICS
Getting Started with Vercator Projects
Getting Started
- Once logged in to Vercator, click the Create Project option on the home page, select Projects or follow this link: https://vercator.cloud/web/new/projects
- This page is the main projects page where you can create a project to run different Vercator processing within.
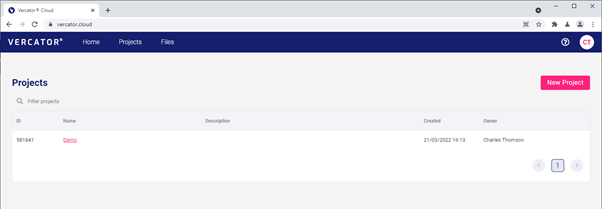
- Click ‘New Project’ to start and fill in some basic details like the Project name and click ‘Create’.
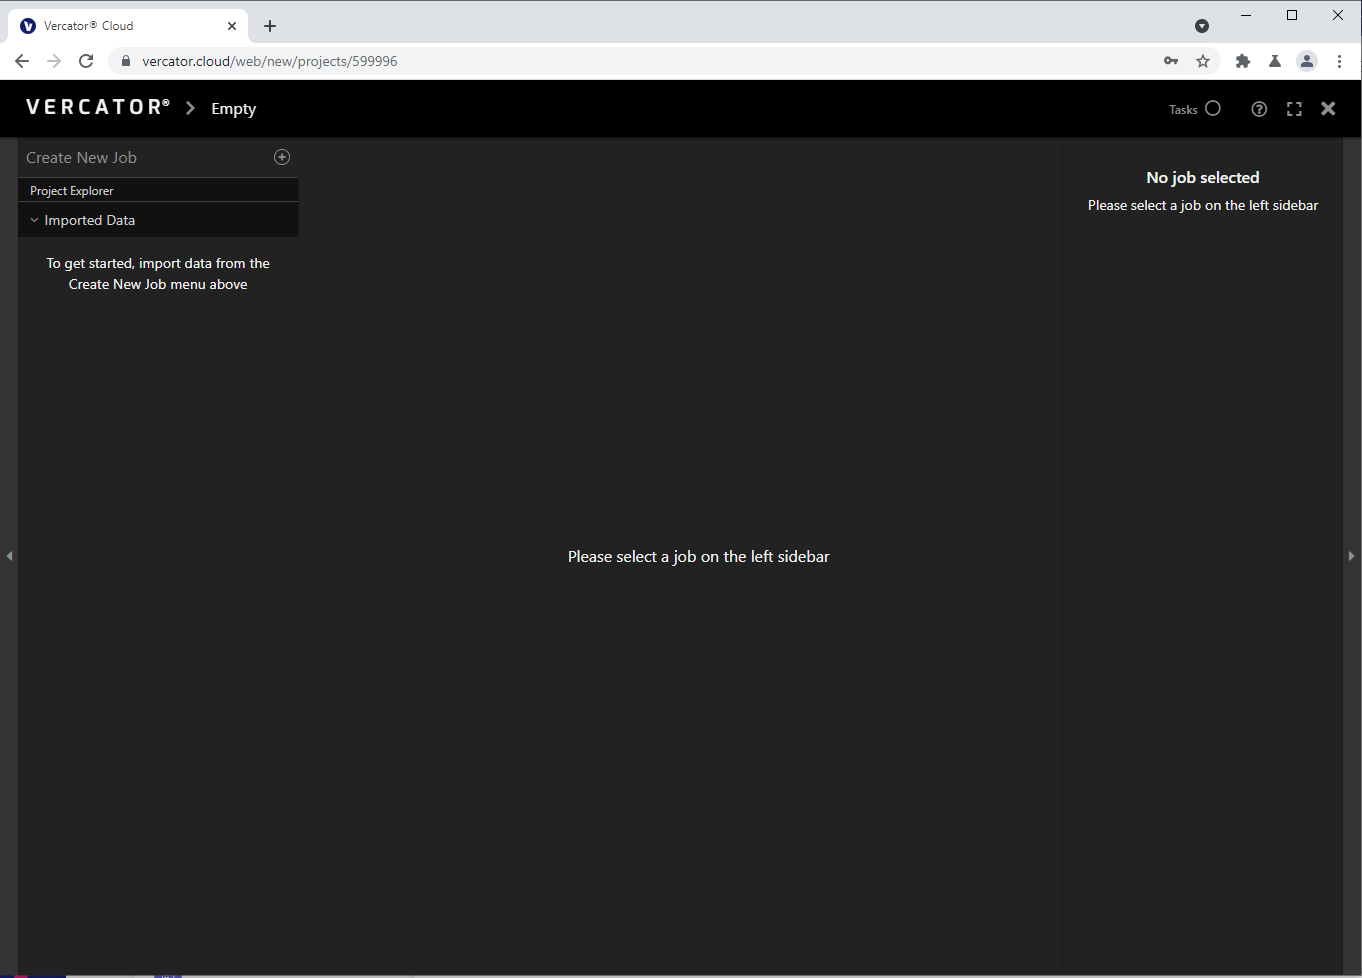
- This will then launch the project into the Project View as below. More can be read about this interface here: https://vercator.com/kb/project-interface/

Import Data
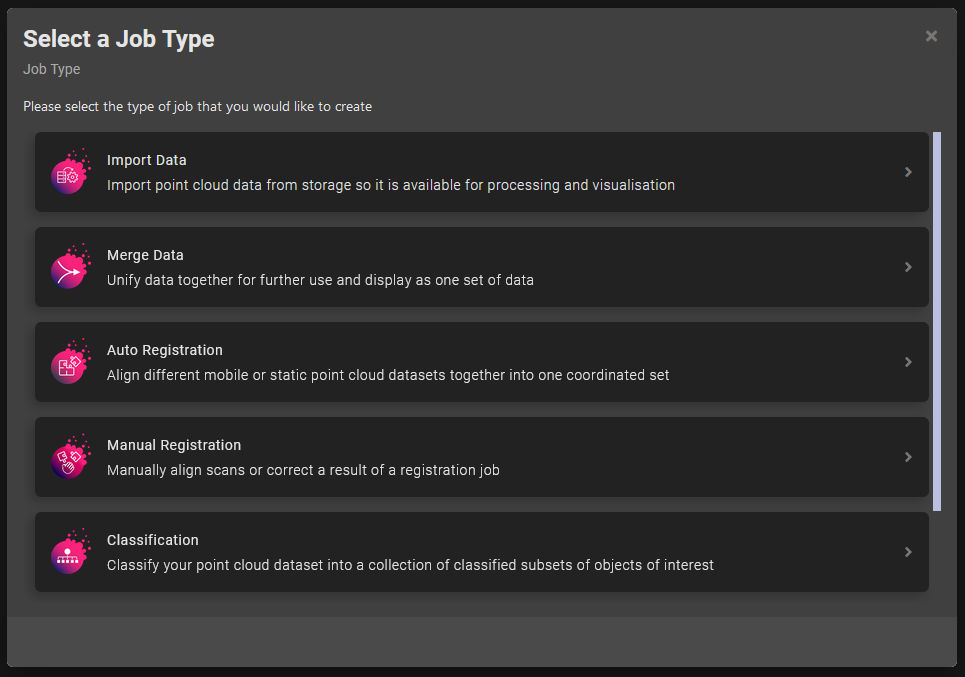
- First we must import data either from Vercator storage or from third party attached storage. If you have no data uploaded then head to the files page to do this first. Then, click the + by ‘Create New Job’ on the top of the left-hand menu and pick ‘Import Data’ from the job type options.

- Then pick the data you wish to process using the file picker and press the Import button.
ℹ️ Current project import data file size and format requirements can be read here.


- The data will start being imported and will show a processing icon. This will take a few minutes depending on data size. You will see process on the right-hand side menu in the ‘Job Progress’ menu where a progress bar is available.
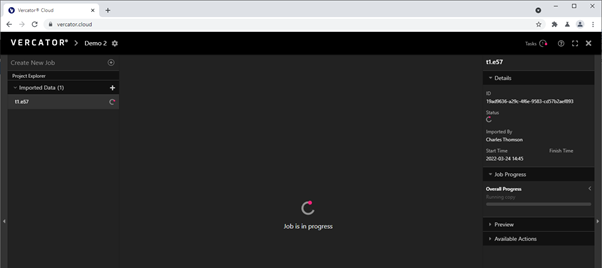

- Once completed successfully a green tick will appear by the data and the 3D view will load showing the data. This will allow it to be used for processing.
Running a Processing Job
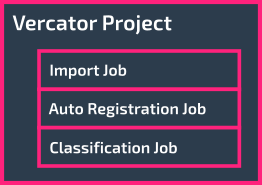
Once data is imported, it can then have a number of processing job types run on it, e.g. auto-registration or classification. The results of these jobs can be chained together to form a workflow, taking the results of one as the input of the next.
For example: Import > Auto Registration > Optimise Registration > Merge > Classification > Export.
You can read about the jobs in detail from the Jobs menu item in this Knowledge Base. Below, we describe the Classification job then Export as an example.
Classification
- To classify the data, click the ‘Create New Job’ + in a circle at the top of the left-hand sidebar.
- This will bring up the job selection menu. Select ‘Classification’.

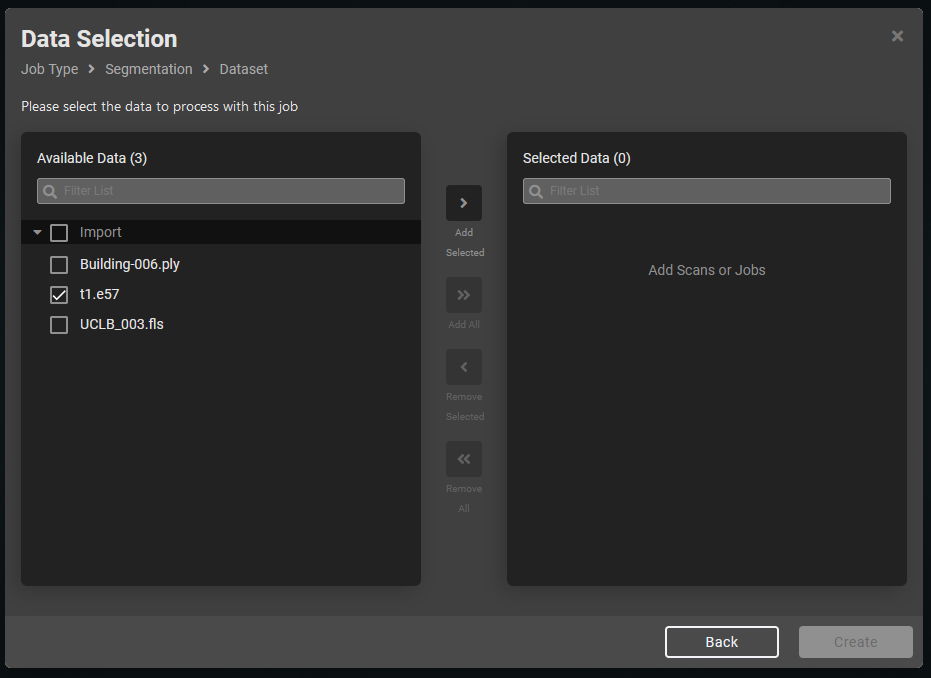
On the next screen, select the data from the left column and click the ‘add selected’ button to add to the right-hand column as below. Only 1 file can be added to the right column per job currently. - Click ‘Create’ when the data you wish to have classified has been added.


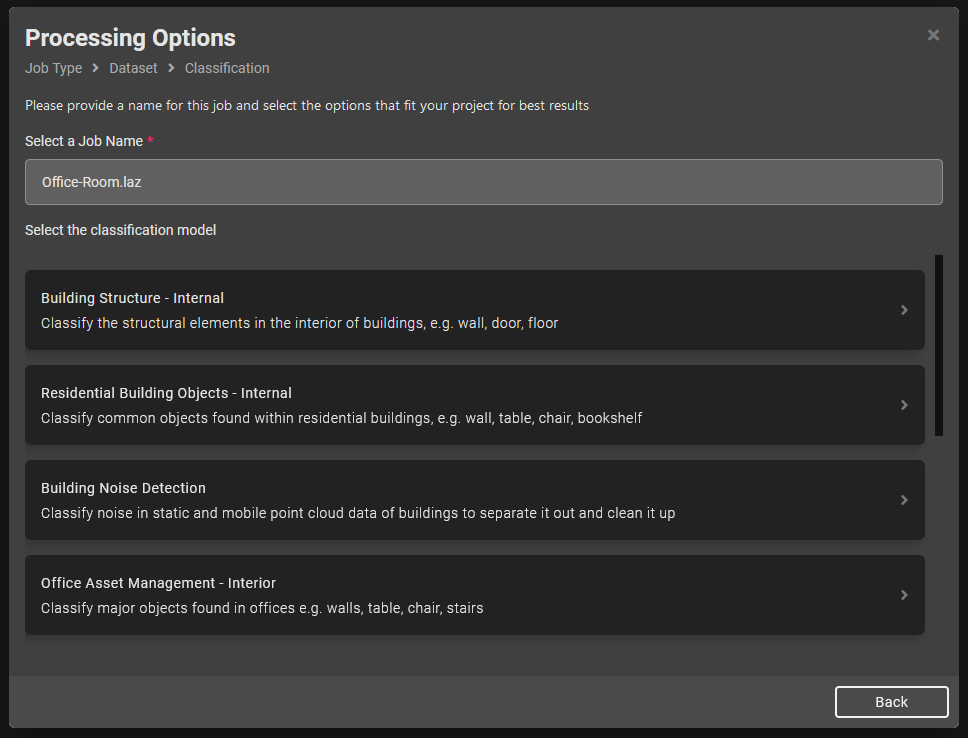
- On the next screen give the job a name (or use the auto name) and select the type of Classification you wish to perform.

- The Classification job will be queued and an in progress spinner will appear. Once the processing has finished the result will be available for inspection in the central 3D viewer. The right-hand sidebar allows the user to enable or disable different classes, using the eye icon, to isolate or remove them for inspection. It also provides a count of the number of instances of that object it found.


Export Data
- To export data that has been classified, click the ‘Create New Job’ + in a circle at the top of the left-hand sidebar. This will bring up the job selection menu. Select ‘Export Data’.
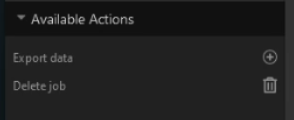
- Alternatively, select the classification to be exported in the left sidebar menu, and choose ‘Export Data’ from the right sidebar menu.

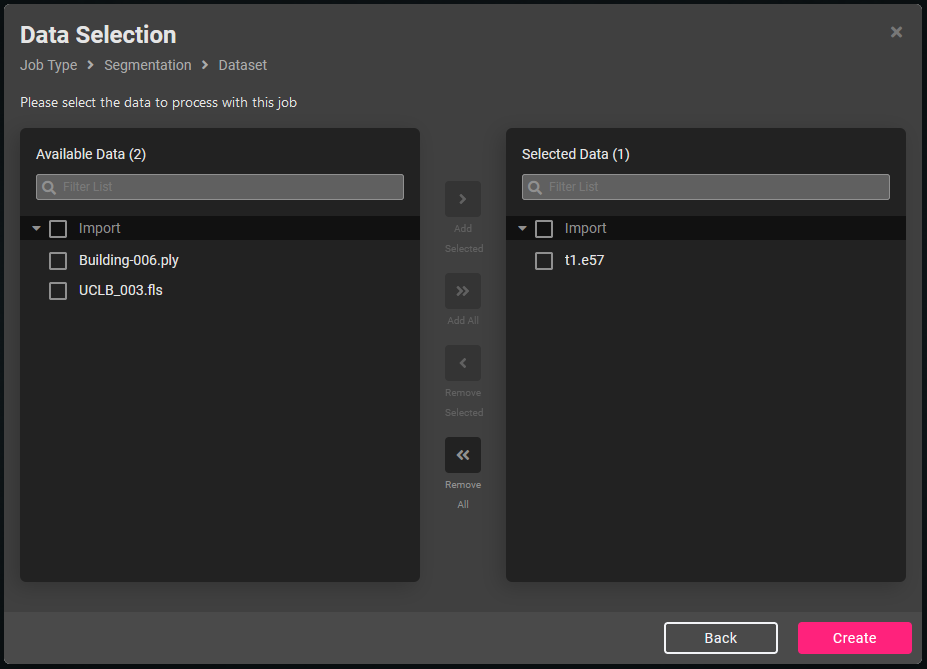
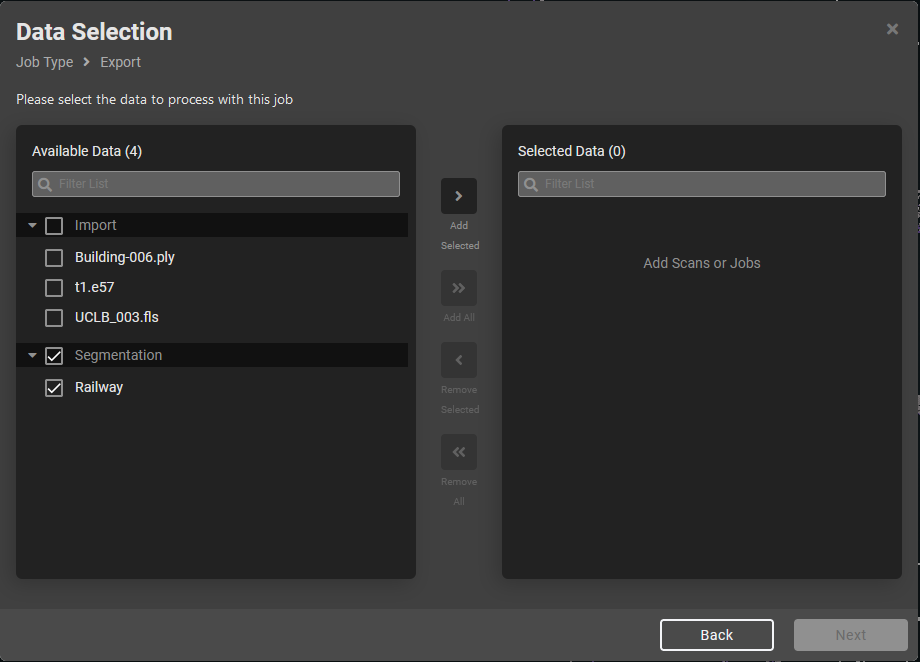
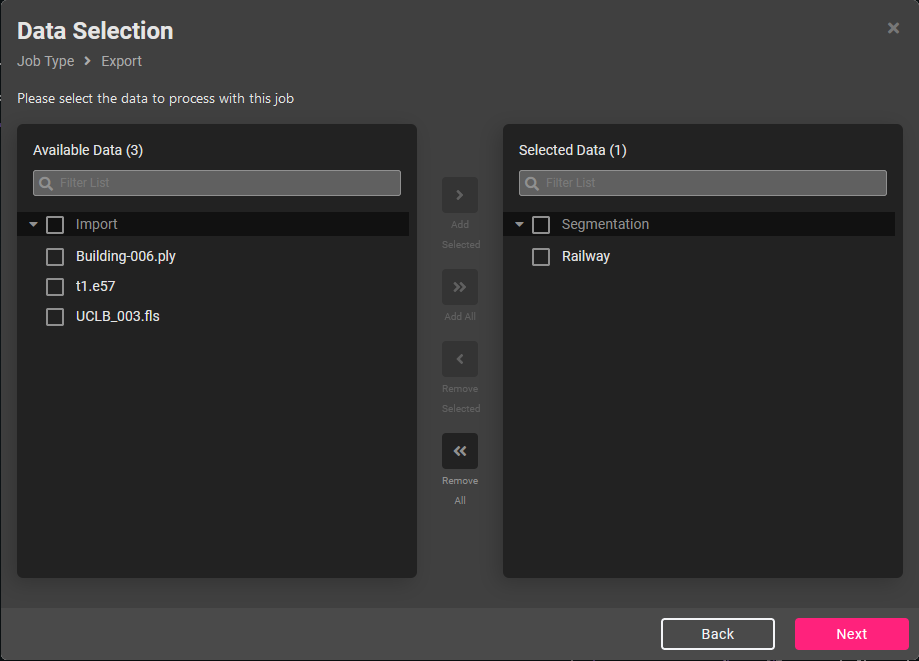
- The data picker will appear. Select the data from the left column and click the ‘add selected’ button to add to the right-hand column as below. Only 1 file can be added to the right column per job at the moment. Click next when data has been selected.


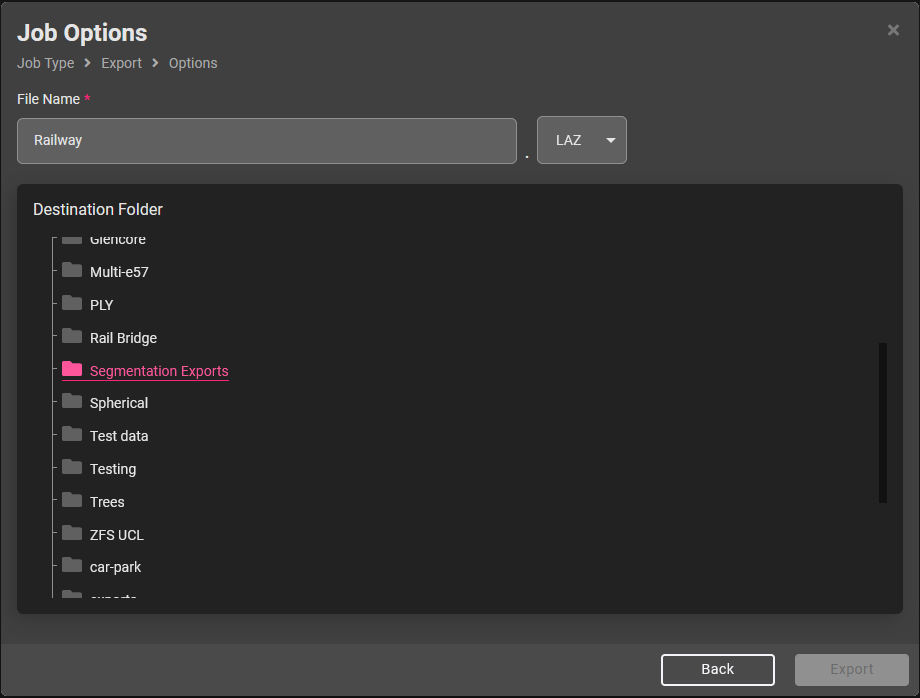
- The final stage is to set the file name, export format and the location of the export. Please pick a folder to continue and then you can press the Export button to queue the export job. The top-level folder cannot be chosen for export destination, nor can the Example Data folder we provide as it is read only. So, if you have no sub-folders listed then please create a folder from the files page first: https://vercator.cloud/web/new/files

Feedback & Support
If you have feedback or hit an issue use the Vercator support help page here.