Knowledge Base & Support
TOPICS
Classification
Classification allows you to extract insights and identify objects within uniform point cloud datasets for downstream tasks. Different classification models can be chosen to extract objects for building interiors or linear infrastructure such as power lines or highways.
- To classify the data, click the ‘Create New Job’ + in a circle at the top of the left-hand sidebar.
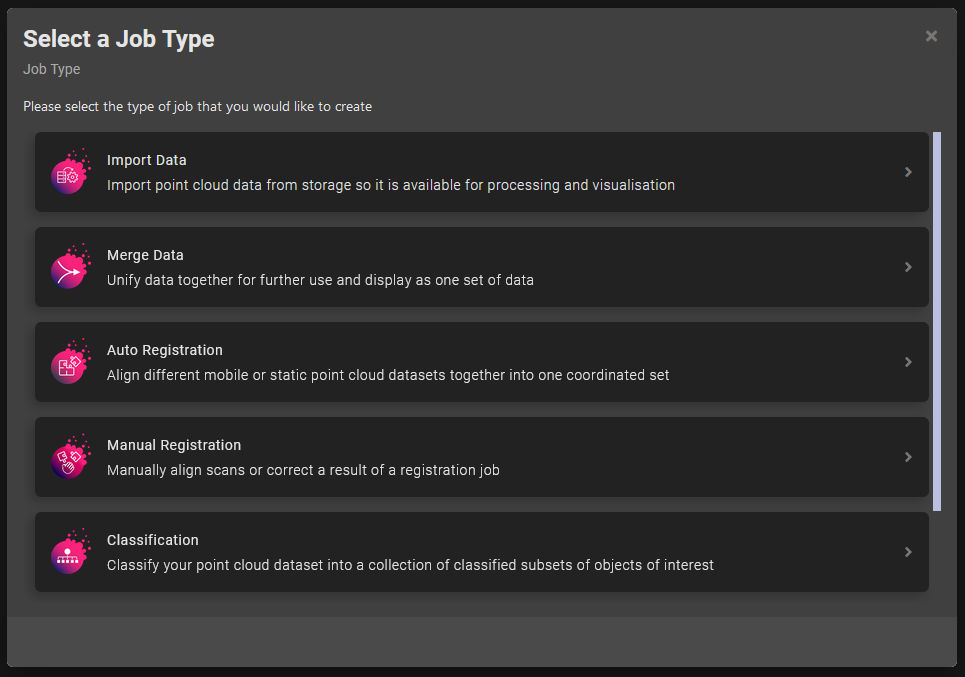
- This will bring up the job selection menu. Select ‘Classification’.
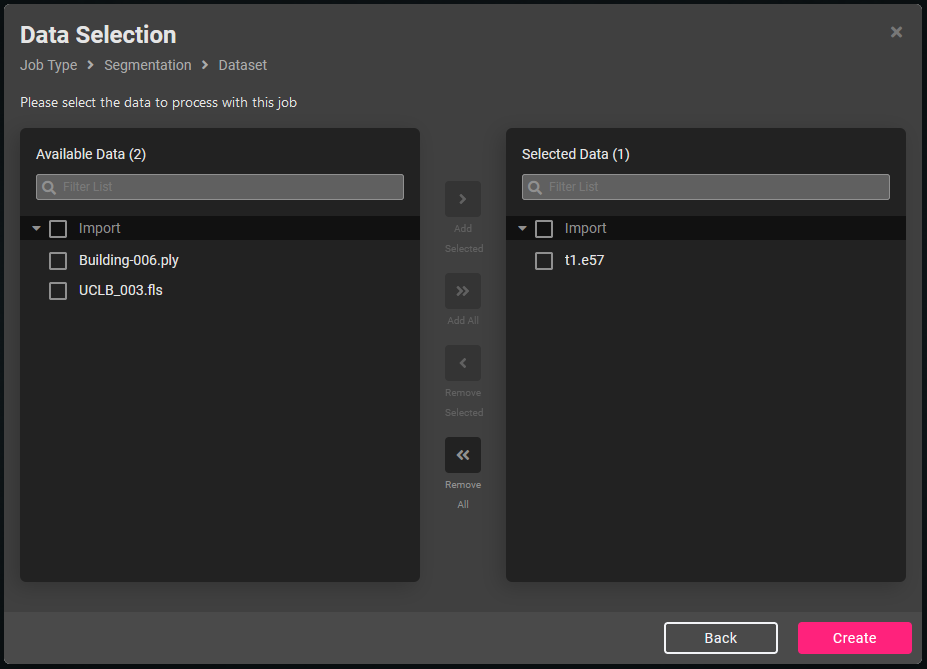
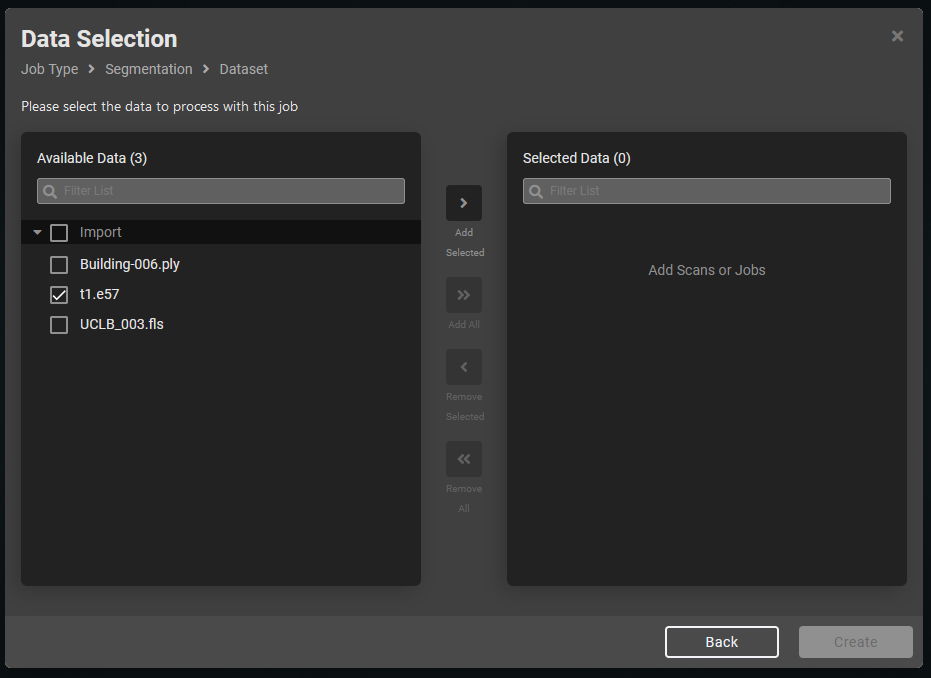
- On the next screen select the data from the left column and click the ‘Add Selected’ button to add to the right-hand column as below.
Only 1 job result can be added to the right column at the moment. Click ‘Create’ when the data to be classified has been added.


- Give the job a name and select the type of classification you wish to perform from the list of AI classification models that can be run. You can view the details of which objects the models have been trained to identify here.
- The Classification job will be queued and an in progress spinner will appear. Once the processing has finished the result will be available for inspection in the central 3D viewer. The right-hand sidebar allows the user to enable or disable different classes, using the eye icon, to isolate or remove them for inspection. It also provides a count of the number of instances of that object it found.