

Knowledge Base & Support
TOPICS
Export
The export job from Vercator Projects allows you to output your processed data into many industry-standard formats (e57, rcs etc) for downstream use. This job type will generate unstructured data as a result. To export structured data, see this article here.
- To export data that has been segmented, click the ‘Create New Job’ + in a circle at the top of the left-hand sidebar. Export data can also be chosen from the Available Actions menu in the right sidebar when a non-registration job is selected.
- This will bring up the job selection menu. Select ‘Export Data’.
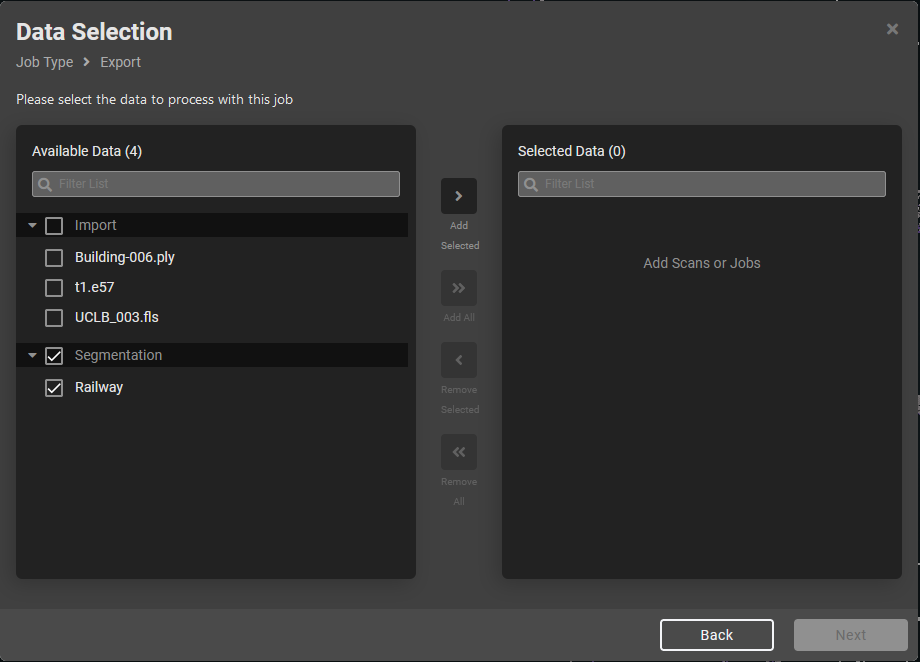
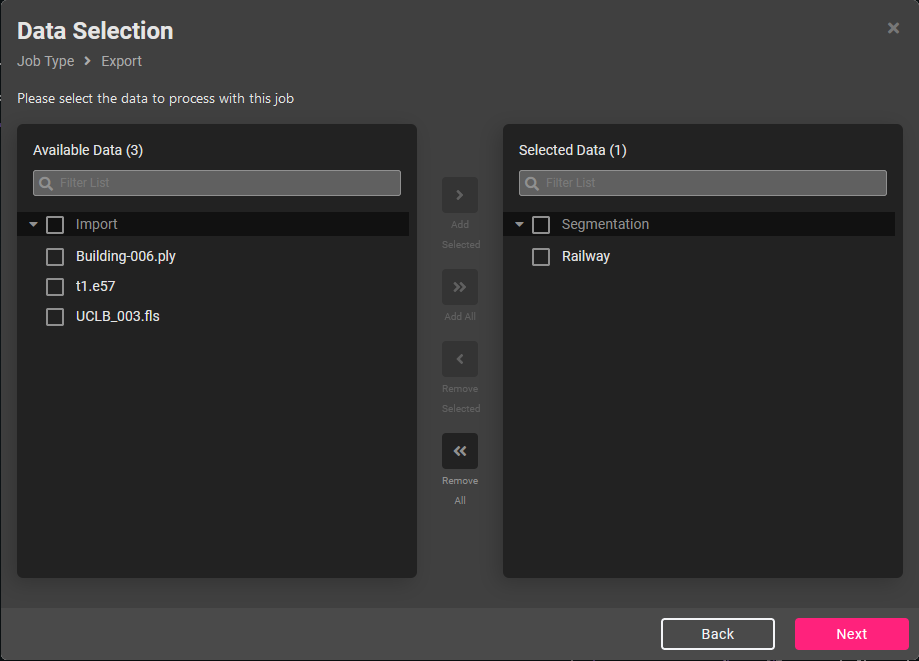
- The data picker will appear. Select the data from the left column and click the ‘Add Selected’ button to add to the right-hand column as below. Only one job can be added to the right column at the moment. Click next when data has been selected.

- The final stage is to set the file name, export format and the location of the export. Please pick a folder and click next to continue.
- The Example Data folder we provide is read-only so please don’t choose it. If you have no sub-folders listed then please create a folder from the Files page first.
- If the data to be exported is classified: there will be a checkbox to choose whether the export is one class per file (the default) or all classes in one file.

- You then can set the export settings for the job and whether to apply subsampling and/or cubing the data.
- The Estimated Output info tells you how many points will be exported. This must be under our format limits to proceed:
- 100 million points per file for all formats, except LAZ/LAS which is not limited.
- The Estimated Output info tells you how many points will be exported. This must be under our format limits to proceed:
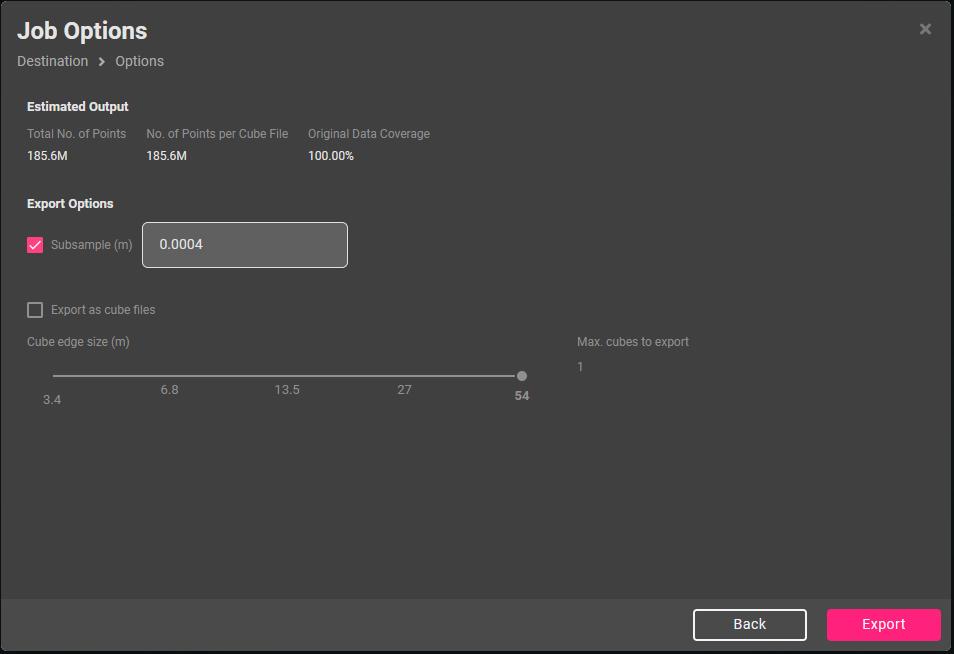
- If the data to be exported is larger than our current format limits in points then it must be subsampled or split up into cubes to proceed. If this is required, you can enable either option and choose the amount of subsampling as well as cubes/cube size using the slider.
- Make changes to subsampling and/or cubing until the Estimated Output is no longer red and falls under our format limit for the file type you chose.
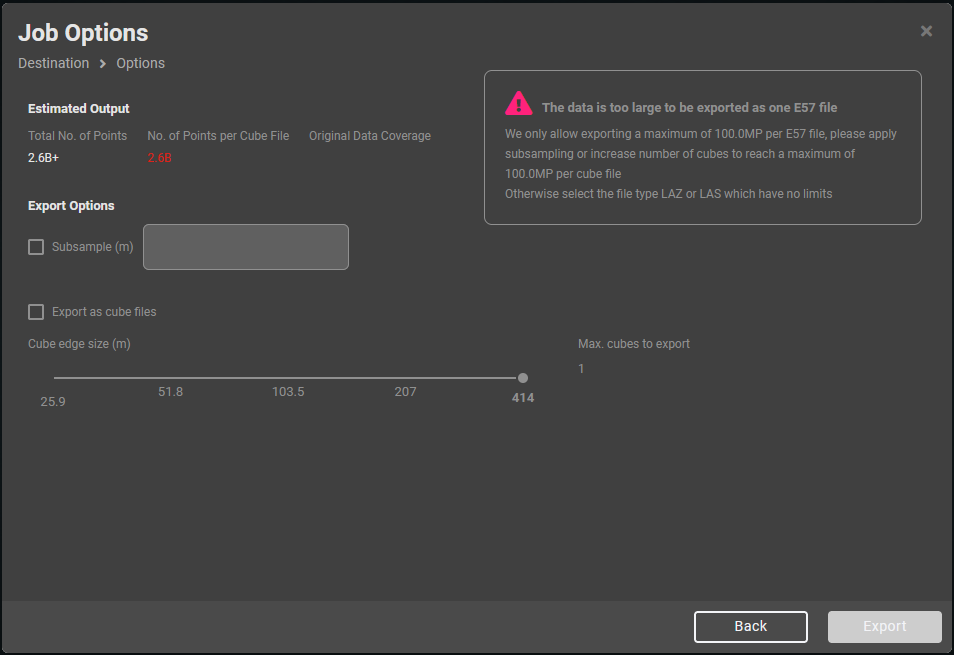
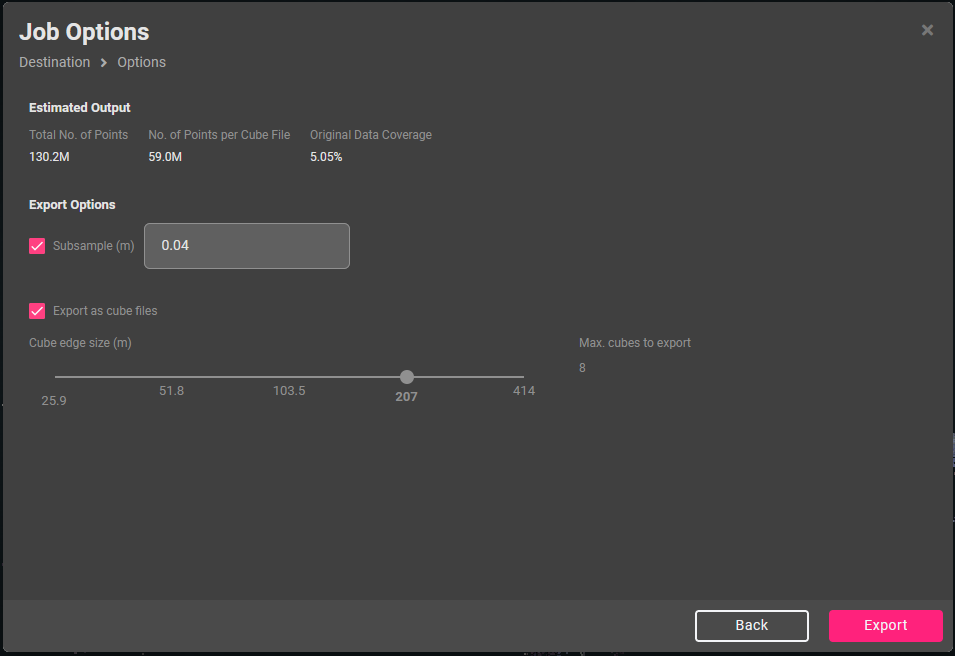
- If the file size limits have been satisfied, press the Export button to queue the export job.